Thursday, 17 October 2013

Warning of serious CryptoLocker virus

We’ve seen one of the nastiest viruses we’ve ever encountered in the shop this week, called CryptoLocker. After the infection, the virus encrypts all your documents and photos. It then demands a payment of up to 300 Euros to decrypt the files, which needs to be acted on within a time limit after which decryption will no longer be available:

image

The bad news is this isn’t the usual scare-mongering we often see with so-called Ransomware. The virus has genuinely encrypted the files and there really is no way to unscramble your data without paying the fee which we wouldn’t recommend and has of course no guarantees! If you do get the virus, disconnect your Internet connection to prevent further files becoming encrypted.

The virus is relatively easy to remove but your files will still be unusable. You will have to rely on a backup, or the slim possibility of a little known feature of some versions of Windows called Shadow Copy.

According to Sophos, a security software company, the virus is spread via email or botnets. Botnets exist on already infected machines and allow further viruses and malware to be attached, so it’s vitally important that you have your virus protection up to date and we’d suggest running a full scan of Malwarebytes as well. Our recommendation would also be to have Malwarebytes Pro active on your machine for real-time malware protection.

The video below from Sophos shows the virus in action:

Please do give us a call on 01822 618544 if you have any concerns.

Tuesday, 8 October 2013

Review and video of the Micro Drone 2.0 Quadrocopter with on-board camera from Extreme Fliers

IMG_0065 md 2

We’ve had a range of toys and gadgets from Extreme Fliers over the last few years and they’ve all been a lot of fun. We saw the company on Dragon’s Den originally and then at a trade show. Their Robocopter GST is easily the best RC helicopter we’ve had our hands on. It’s stable and robust and if it does have a nasty crash most of the parts are available from us or direct from Extreme Fliers.

Last year they released their Micro Drone Quadropter, with four rotors, 100m plus range and the ability to perform a variety of flips and other stunts. This is fantastic fun – simple to start flying but a challenge to master – which is exactly what you want! And at a good price too (£70 RRP). It’s still available at a reduced price whilst stocks last.

This year they’ve brought out version 2.0, which can take an optional on-board camera and has further improved stability. You can chuck this one in the air and it’ll right itself – impressive stuff!

We’ve had a chance to try it out with a standard definition camera attached and have been impressed. Take a look at it in action in the video below. In case it’s not obvious I am no master flyer! Plus there are a few obstacles in the shop to avoid. But it’ll work outside too and we’ve had lots of fun with version 1.0 out on the moors.

I think you’ll agree the video is surprisingly good for a £20 add on. The build quality of the Micro Drone is good, especially considering the price point (also £70 RRP). Again, most of the parts are replaceable and the device charges off a USB port on your computer in around an hour. You’ll need 4 AA batteries for the controller and they’ll last a fair few flights.

It’s easy to pick up: you plug the battery in, turn the remote on and push the thrust slowly forward and then back. You’ll hear an encouraging beep and then you can start flying. It has two modes of flight: mode 2 and mode 4. The difference is how the two sticks control movement. I prefer the switch to the left which banks left and right with the right stick and turns left and right with the left stick. But it’s a personal preference. The manual appears to have this the wrong way around in its description but you’ll soon work out which control method your prefer.

It’s useful to know that the black blades / white LEDs are always at the front of the Micro Drone. So practice with it lined up this way and learn how to take off and go forwards and backwards.

The range is excellent and you can easily send the Quadrocopter flying over 100m into the sky. Flick the stunt switch to stunt mode and you can perform a range of flips and acrobatic manoeuvres. It’s very impressive but give yourself some space when trying these for the first time!

The camera attaches to the base of the Micro Drone with the supplied double sided tape and then plugs into its main board. All the drone’s lights come on and as you switch the camera on and off the lights respond accordingly. The function button is used to perform a simple flip even in standard mode. Now it turns the camera on and off to start recording video or to take a photo. Make sure your stop recording before unplugging the battery and removing the MicroSD card otherwise the recording will be corrupt.

The camera module kit comes with a 1GB MicroSD card, card reader, some screws and even a screwdriver. The camera itself seems decent enough build-wise for the price and I’m impressed with the quality of the footage. But the accessories are an afterthought. The card reader is poor quality and you’ll have to be careful inserting the very thin MicroSD card into its slot. Ensure it goes into the reader slot itself and doesn’t disappear into the housing! If it does you’ll have to gently open the housing to retrieve it. Still with careful use it does the job.

Overall this new Micro Drone from Extreme Fliers is a hit and I expect it to do well this Christmas with young children and children aged over 40! I’m having trouble putting it down!

You can buy it here: http://thetechnologycompany.co.uk/gadgets. And if you’re local, come and try out all our toys in the shop.

Friday, 4 October 2013

Extending WiFi coverage using Powerline adapters

One of the most common questions we have from customers, is how to extend wireless coverage around the house. First, try and locate your router as high and visible as is possible. This can often improve your signal dramatically.

If this offers no improvement then you have several options, but by far the easiest method is to use Powerline adapters. These simply plug into household power sockets and use your existing electricity cabling to reliably extend your Internet access around the house. They are generally bought in pairs: one end is wired to your router; and the other end can be plugged in wherever you like, thereby extending your wireless coverage.

In the video below I show the basic installation of the popular TP-Link TL-WPA281 pair of adapters:

 
The smaller adapter is plugged into a power socket near your router.
Connect this adapter to your wireless router using the supplied Ethernet cable. Plug the longer wireless adapter into a socket where you'd like to extend wireless coverage to. A new wireless network (TP-LINK_XXX) will be created which you can connect to with any wireless device:
 
image
 
If you'd like to setup security on this network which we’d recommend, you will need to access the configuration page. The easiest way to do this is using the supplied CD. Or you can download the file here. Running the file will locate the adapters on your network and allow you to connect:
 
SNAGHTML341ec7
 
Enter admin for username and password. In the configuration page click on Wireless Security down the left hand side, click on the WPA-PSK/WPA2-PSK radio button and enter a password of at least 8 characters in the PSK password box. You have now secured your network.
 
SNAGHTML384cd8
 
This step is optional but It's worth setting the wireless channel to something that doesn't interfere with your existing network. There are three non-overlapping wireless channels: 1, 6 and 11. Log in to your router and find out the wireless channel it’s using. Then select one of the other two for the Powerline adapter.

Thursday, 3 October 2013

Logging into a remote computer with Windows Remote Desktop Connection

If you’ve ever needed to access your work machine from home, Windows Remote Desktop Connection offers a very convenient solution. You can sit at home as if you were in front of your work machine. You can use all your work applications and even print of straight to your local home printer.

In the video below I go through how to set up a connection. Give it a try and let me know how you get on!

Monday, 23 September 2013

How to use your own wireless router with Sky Broadband

I reluctantly moved to Sky for my Broadband a few months ago. Their low prices and unlimited downloads were just too tempting.

I’ve been fairly happy with the service I’ve had – speed and reliability have been about the same as from Zen, my previous provider. But unfortunately Sky forces you to use their wireless router. And their provided router is fairly limited in functionality and more importantly has inferior wireless coverage to the TP-Link 8960N it replaces.

In the video below I’ll show you how you can still use your existing router, or even a new one together with Sky’s router:

Friday, 20 September 2013

Apple’s new iOS 7: overview and first impressions

The latest iOS update has just been released from Apple. With a completely new design and some significant new features I thought I’d give a brief overview and my first impressions.

Updating a iPhone 4s and an iPad 4 should have been straightforward but Apples’ servers were overloaded and the first several attempts disappointedly failed. Late last night though the update was successful on the iPhone and this morning with America asleep, the iPad update was swift.

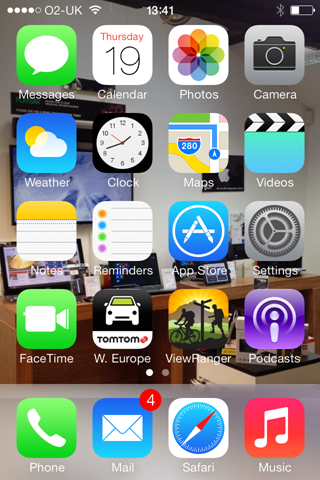
First impressions on the 4s were not great. The new flat interface looked very refreshing but animations were no longer smooth.
image

However my iPhone had started to lag slightly in the previous iOS version so I decided to use this new iOS as an excuse for a fresh install and completely wiped the iPhone and started from scratch. With a significant improvement in speed I started to explore iOS 7’s new features.

Control Centre
image

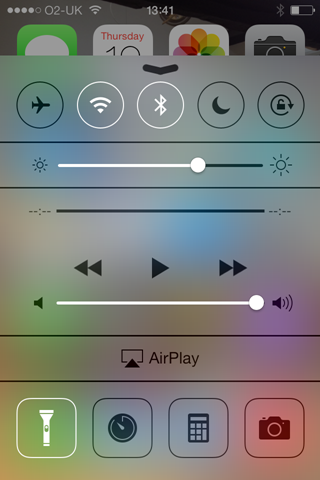
A swipe up from the bottom of any screen, including the lock screen, reveals the new Control Centre. You can now activate the LED flash as a torch, which is surprisingly handy. The calculator, camera and stopwatch apps are also easily available. And the brightness control is now conveniently placed.

General Interface

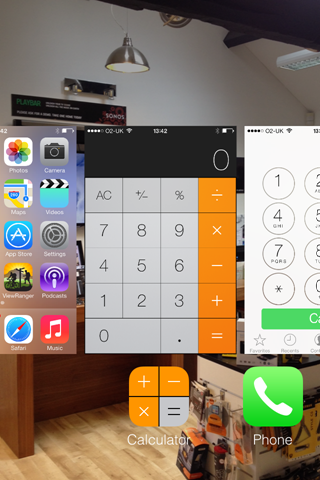
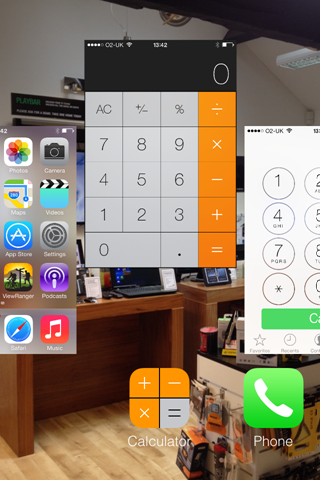
Search can now be accessed from any home screen by swiping down from the middle of the screen and application switching and closing is now animated and far easier to use. A double click of the home button lets you flick between open apps and swiping up an open app closes it rather satisfyingly.
image

image

New Camera App

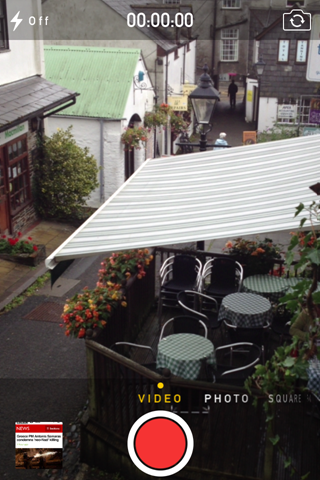
The camera app has been overhauled. You swipe across the screen to change between photo, video, panorama and a new square mode. And you have an effects mode which is not something I’d use but I know a lot of people will.
image

Overall the new app is welcome but won’t really change how I use the camera.

The photos app has been redone and looks quite confusing at first. You can now share videos through iCloud, but videos don’t sync via Photostream as I understood they would. This would have been handy – unfortunately you still need to use a cable to transfer videos to your computer or a third party app. I use Photo-sync which works very well between iPhones, iPads, Macs and PCs.

Airdrop

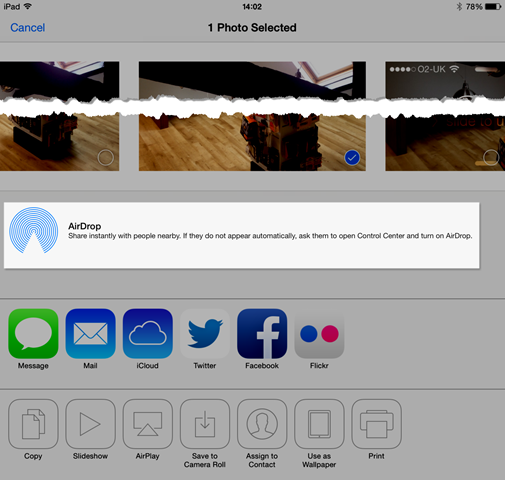
Which brings me onto Airdrop, another feature I was looking forward too. Airdrop allows easy sharing of files via WiFi or Bluetooth between iOS devices. However Apple have seen fit to only allow this option on iPhone 5, iPad 4 and newer devices. I can’t imagine why, especially since the iPhone 4s will still be available alongside the new iPhone 5s/c/.
 image

Safari

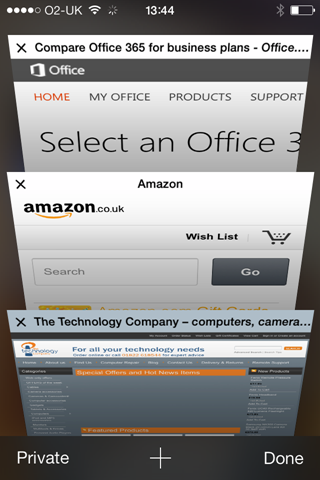
The web browser has been updated too and again feels a little confusing at first. There are some nice touches though, like the animated cascaded open tab view allowing you to flick between open pages:
image

iOS 7 in general tries to use as much of the screen as possible and apps like Safari hide icons as you flick through a page. This can be a little disconcerting since it’s not immediately obvious how you move to another page! Tapping on the address bar or flicking down a page off the screen again reveals the hidden icons.

Conclusion

Having spent a couple of days with the new OS now, my general impression is good. iOS was in need of a change – it was starting to look dated. It works very well on the new iPad 4 but does still lag a little on the 4s, even after the complete refresh. Good job I’m due an upgrade!

But I would exercise caution in upgrading older devices especially the iPhone 4 and the iPad 2.

A very nice added bonus of the update is devices activated after September 1st 2013 can download all of Apples’ productivity apps for free – worth over £30! You’ll get prompted to download Keynote, iMovie, iPhoto, Pages and Numbers. And then these will be available across all your iDevices.

Friday, 13 September 2013

Microsoft Office 2010 Starter Edition needing activation

Many version of Windows 7 came with this completely free edition of Office which was only limited on features but not time.

However an Windows update on Tuesday (10th September 2013) has caused users to be prompted to purchase the full version of Office when trying to open Word or Excel documents:

Activate office

Fortunately there is a simple solution, not involving parting with any money to Microsoft. You’ll need to uninstall Microsoft Office 2010. Click on the Start orb at the bottom left of the screen, and type add remove. Click on Add or remove programs as below:

add remove

Next click on Microsoft Office 2010 and uninstall:

uninstall program

You should then be able to run Word and Excel as before.

If you’re using Microsoft Office 2010 Starter Edition and have not yet been effected, this is the update you need to watch out for (KB2589275). So you could also un-tick the update before it causes any trouble. Or you could uninstall the update, but I prefer the above method.

Update to Microsoft Office 2010 (KB2589275) 32-bit Edition

Please let me know how you get on!