One of the most common questions we have from customers, is how to extend wireless coverage around the house. First, try and locate your router as high and visible as is possible. This can often improve your signal dramatically.
If this offers no improvement then you have several options, but by far the easiest method is to use Powerline adapters. These simply plug into household power sockets and use your existing electricity cabling to reliably extend your Internet access around the house. They are generally bought in pairs: one end is wired to your router; and the other end can be plugged in wherever you like, thereby extending your wireless coverage.
In the video below I show the basic installation of the popular TP-Link TL-WPA281 pair of adapters:
Friday, 4 October 2013
Extending WiFi coverage using Powerline adapters
Thursday, 3 October 2013
Logging into a remote computer with Windows Remote Desktop Connection
If you’ve ever needed to access your work machine from home, Windows Remote Desktop Connection offers a very convenient solution. You can sit at home as if you were in front of your work machine. You can use all your work applications and even print of straight to your local home printer.
In the video below I go through how to set up a connection. Give it a try and let me know how you get on!
Monday, 23 September 2013
How to use your own wireless router with Sky Broadband
I reluctantly moved to Sky for my Broadband a few months ago. Their low prices and unlimited downloads were just too tempting.
I’ve been fairly happy with the service I’ve had – speed and reliability have been about the same as from Zen, my previous provider. But unfortunately Sky forces you to use their wireless router. And their provided router is fairly limited in functionality and more importantly has inferior wireless coverage to the TP-Link 8960N it replaces.
In the video below I’ll show you how you can still use your existing router, or even a new one together with Sky’s router:
Friday, 20 September 2013
Apple’s new iOS 7: overview and first impressions
The latest iOS update has just been released from Apple. With a completely new design and some significant new features I thought I’d give a brief overview and my first impressions.
Updating a iPhone 4s and an iPad 4 should have been straightforward but Apples’ servers were overloaded and the first several attempts disappointedly failed. Late last night though the update was successful on the iPhone and this morning with America asleep, the iPad update was swift.
First impressions on the 4s were not great. The new flat interface looked very refreshing but animations were no longer smooth.
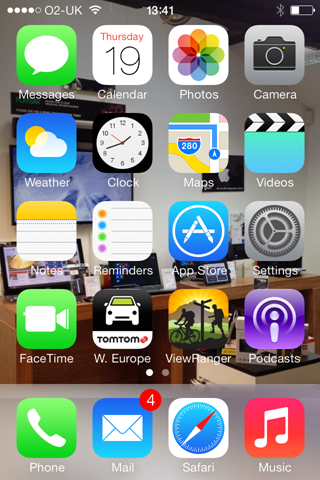
However my iPhone had started to lag slightly in the previous iOS version so I decided to use this new iOS as an excuse for a fresh install and completely wiped the iPhone and started from scratch. With a significant improvement in speed I started to explore iOS 7’s new features.
Control Centre
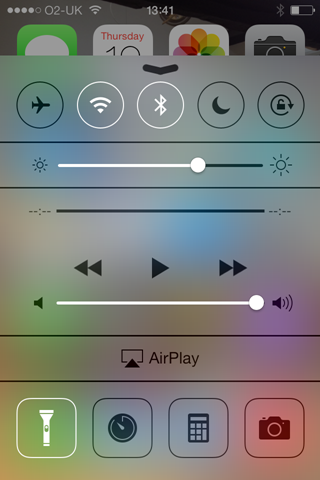
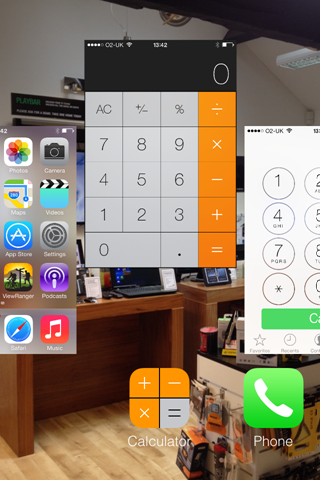
A swipe up from the bottom of any screen, including the lock screen, reveals the new Control Centre. You can now activate the LED flash as a torch, which is surprisingly handy. The calculator, camera and stopwatch apps are also easily available. And the brightness control is now conveniently placed.
General Interface
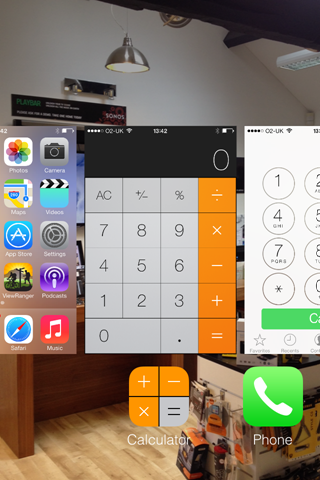
Search can now be accessed from any home screen by swiping down from the middle of the screen and application switching and closing is now animated and far easier to use. A double click of the home button lets you flick between open apps and swiping up an open app closes it rather satisfyingly.
New Camera App
The camera app has been overhauled. You swipe across the screen to change between photo, video, panorama and a new square mode. And you have an effects mode which is not something I’d use but I know a lot of people will.

Overall the new app is welcome but won’t really change how I use the camera.
The photos app has been redone and looks quite confusing at first. You can now share videos through iCloud, but videos don’t sync via Photostream as I understood they would. This would have been handy – unfortunately you still need to use a cable to transfer videos to your computer or a third party app. I use Photo-sync which works very well between iPhones, iPads, Macs and PCs.
Airdrop
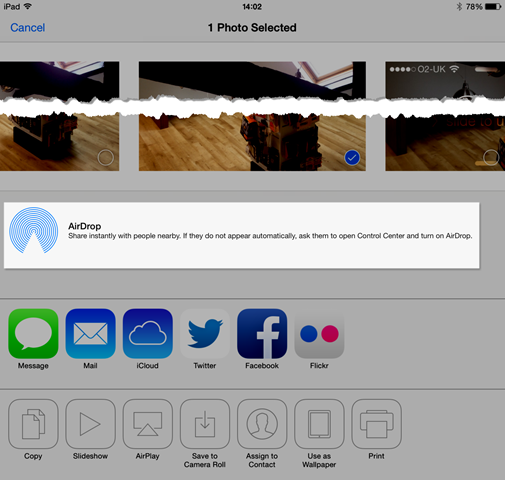
Which brings me onto Airdrop, another feature I was looking forward too. Airdrop allows easy sharing of files via WiFi or Bluetooth between iOS devices. However Apple have seen fit to only allow this option on iPhone 5, iPad 4 and newer devices. I can’t imagine why, especially since the iPhone 4s will still be available alongside the new iPhone 5s/c/.
Safari
The web browser has been updated too and again feels a little confusing at first. There are some nice touches though, like the animated cascaded open tab view allowing you to flick between open pages:
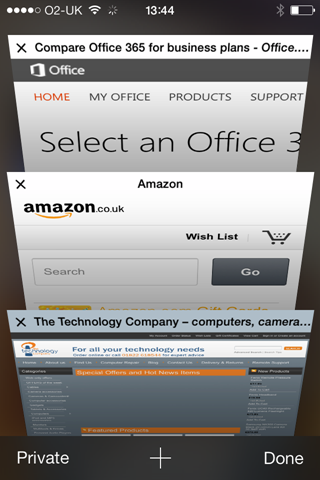
iOS 7 in general tries to use as much of the screen as possible and apps like Safari hide icons as you flick through a page. This can be a little disconcerting since it’s not immediately obvious how you move to another page! Tapping on the address bar or flicking down a page off the screen again reveals the hidden icons.
Conclusion
Having spent a couple of days with the new OS now, my general impression is good. iOS was in need of a change – it was starting to look dated. It works very well on the new iPad 4 but does still lag a little on the 4s, even after the complete refresh. Good job I’m due an upgrade!
But I would exercise caution in upgrading older devices especially the iPhone 4 and the iPad 2.
A very nice added bonus of the update is devices activated after September 1st 2013 can download all of Apples’ productivity apps for free – worth over £30! You’ll get prompted to download Keynote, iMovie, iPhoto, Pages and Numbers. And then these will be available across all your iDevices.
Friday, 13 September 2013
Microsoft Office 2010 Starter Edition needing activation
Many version of Windows 7 came with this completely free edition of Office which was only limited on features but not time.
However an Windows update on Tuesday (10th September 2013) has caused users to be prompted to purchase the full version of Office when trying to open Word or Excel documents:
Fortunately there is a simple solution, not involving parting with any money to Microsoft. You’ll need to uninstall Microsoft Office 2010. Click on the Start orb at the bottom left of the screen, and type add remove. Click on Add or remove programs as below:
Next click on Microsoft Office 2010 and uninstall:
You should then be able to run Word and Excel as before.
If you’re using Microsoft Office 2010 Starter Edition and have not yet been effected, this is the update you need to watch out for (KB2589275). So you could also un-tick the update before it causes any trouble. Or you could uninstall the update, but I prefer the above method.
Please let me know how you get on!
Wednesday, 11 September 2013
Syncing Google Calendar with your Android phone or tablet
By default, synching your calendar from your Android phone doesn’t always work as it should. Often calendar updates will only happen one way – from Google Calendar on your desktop to your phone or tablet, but not the other way around. To get them working both ways make sure you complete the following steps. Note that Android devices vary so the screenshots may not look exactly like yours –these are taken from an Asus Fonepad.
Open up the device’s calendar app and click on settings.
If you don’t already have your Gmail account here, you’ll need to add it. Then we need to select this account and enable it to be synched by checking the tick box:
Next click on this calendar as below:
Now when you add an event, make sure this same calendar is selected as below:
You’ll now find calendar events will sync both ways. Good luck!
Tuesday, 3 September 2013
Sharing bookmarks across all your devices with iCloud and troubleshooting
Setting up iCloud Bookmarks Synching
This is very handy feature using Apple's iCloud, but can be frustrating when it doesn't work as it should. I'll firstly go through how to enable the feature and then describe how to deal with any issues that can arise. Bookmarks sync works across iOS devices (iPhone and iPads), Macs and PCs. To enable the feature on your iPhone and iPad, simply slide the switch in Settings / iCloud to on:
On your Mac, select System Preferences / iCloud and tick Safari:
On your PC, you'll need to download the iCloud control panel from here:
http://support.apple.com/kb/dl1455
After installing, you're need to enable Bookmarks with Internet Explorer. If you have Safari installed, you'll have an option to sync with Safari bookmarks instead. With Safari installed, Reading Lists are also synched. Note that iCloud Tabs are only synched across Apple devices.
That's it - all your bookmarks should sync across all your devices.
Troubleshooting iCloud Bookmarks (Advanced)
This normally works fine, but synching across many devices with hundreds of bookmarks can get iCloud in a muddle. Duplicates can appear and you may have to resort to resetting your bookmarks across all devices. This is easier said than done since there is no way of explicitly removing the iCloud bookmarks.
This is the procedure I've found to work - and I've tried a few ways! Please remember, it's unlikely you'll run into any problems. I'm probably pushing this feature to its limits synching across 6 devices with bookmarks going back over 15 years!
Firstly switch off synching on your iPhone and iPad: as above but slide the switch to off. You'll be prompted to delete the bookmarks stored. Confirm this operation:
Now turn off on your PC(s) too. Then delete all your favourites (bookmarks) too. For Internet Explorer:
Windows Key + R and type %userprofile%\favorites as below:
Now select all folders and files and delete. Or copy to a temporary folder if you need a backup to restore at the end of this procedure.
Finally on the Mac, again make a backup of your bookmarks if you're wanting to restore from them. Then with iCloud Safari sync still enabled, delete all your bookmarks (Show All Bookmarks and hold the delete key down is one way!). Wait for this to propagate through to iCloud - leave 15 minutes if possible. Then exit Safari and turn off iCloud sync as above and completely delete bookmarks by deleting the bookmarks.plist file as below. In Finder you'll need to hold down the alt key to see the hidden Library folder:
Now enable iCloud Safari sync again and open Safari. Wait a while and check no bookmarks still left in iCloud don't reappear.
This next step is important if you’re using Windows 8. You need to turn off Internet Explorer syncing, which is part of your Microsoft login. This is not an issue if you logon on to a local account. Here’s how to switch it off:
Now restore your bookmarks and enable iCloud sync on your other devices. If you're not using a Mac, you'd complete this final step on the PC. But do it on one PC first.
Good luck and please let me know how you get on!